
When it comes to garage door maintenance, one crucial aspect that often requires attention is the springs. Garage door springs play a pivotal role in the smooth operation of the door, counterbalancing its weight and facilitating easy opening and closing. However, over time, these springs may wear out or break, necessitating replacement to ensure the continued functionality and safety of the garage door. In this comprehensive guide, we will delve into the process of garage door spring replacement, providing valuable insights, tips, and step-by-step instructions for homeowners looking to tackle this task.
Understanding Garage Door Springs
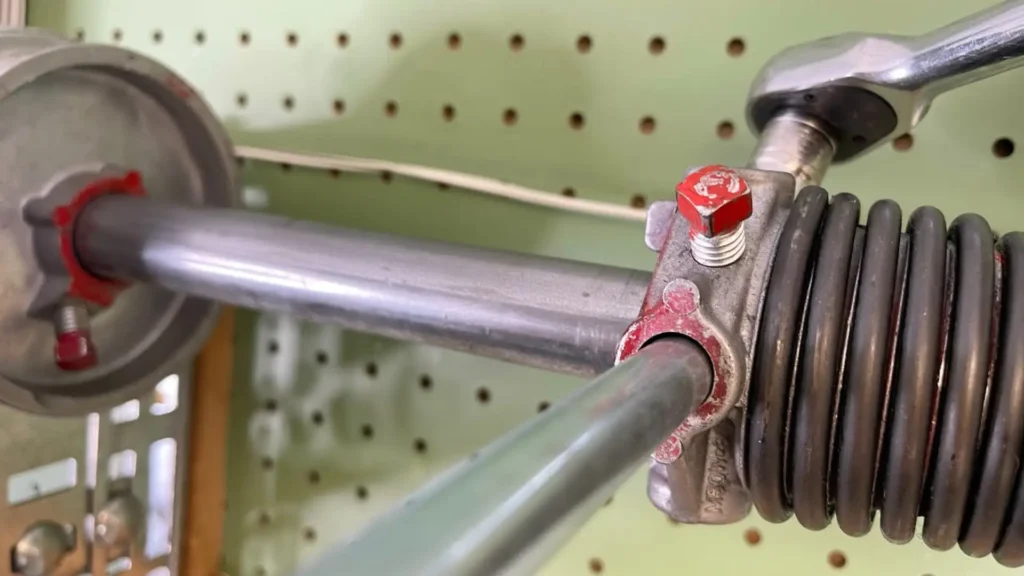
Before diving into the replacement process, it’s essential to understand the role of garage door springs and the different types available. Most garage doors utilize either torsion springs or extension springs to provide the necessary lifting force. Torsion springs are mounted above the door and twist to store energy, while extension springs are located on either side of the door and stretch to provide lift. Familiarizing yourself with the type of springs your garage door uses will help you choose the right replacement components.
Signs That Replacement is Needed
Knowing when to replace garage door springs is crucial for maintaining the safety and functionality of your garage door system. Some common signs that indicate it may be time for spring replacement include visible wear and tear, unusual noises during operation, difficulty opening or closing the door, and a sagging or imbalanced door. If you notice any of these signs, it’s essential to address the issue promptly to prevent further damage and ensure safe operation.
Preparing for Replacement
Before starting the replacement process, gather the necessary tools and materials, including replacement springs, winding bars, safety glasses, gloves, and a ladder. It’s also crucial to disconnect the garage door opener and lock the door in the closed position to prevent it from accidentally opening during the replacement process. Additionally, exercise caution and follow all safety precautions outlined in the manufacturer’s instructions and this guide.
Step-by-Step Replacement Process
- Release Tension: Use winding bars to unwind and release the tension from the old springs. Exercise caution during this step, as springs are under high tension and can cause injury if mishandled.
- Remove Old Springs: Once the tension is released, carefully remove the old springs from the door and mounting hardware.
- Install New Springs: Install the new springs, ensuring they are correctly oriented and secured in place. Follow the manufacturer’s instructions for proper installation.
- Reapply Tension: Use winding bars to gradually apply tension to the new springs, taking care to wind them to the appropriate number of turns as specified by the manufacturer.
- Test Operation: Once the springs are installed and tensioned, test the operation of the garage door to ensure it opens and closes smoothly without any issues.
Learn more:
The Importance of Timely Garage Door Spring Replacement